Creating your own jewelry storage DIY solutions is one of the most satisfying ways to keep your collection organised, tangle-free, and beautifully displayed. With simple materials like wood, frames, branches, or repurposed household items, you can make custom jewelry storage DIY projects that perfectly match your style and space. From wall-mounted jewelry storage DIY racks and vintage frame displays to branch-style stands and drawer organisers, these jewelry storage DIY ideas are budget-friendly, fun to make, and turn everyday storage into charming decorative features. Whether you need a quick weekend project or a more elaborate jewelry storage DIY build, you’ll find inspiring ways to showcase your necklaces, earrings, bracelets, and rings with creativity and care.
Crafted with Care: Gentle Wisdom for Jewelry Storage DIY Projects
Your jewelry storage DIY creations can feel like small works of art — where every hook, shelf, or branch is chosen with love, turning tangled pieces into an organised, beautiful display you’ll enjoy using every day.
- Repurpose with Joy – Turn old picture frames, wooden crates, ladders, or even tennis rackets into unique jewelry storage DIY solutions that carry character and story.
- Vertical Solutions – Build wall-mounted jewelry storage DIY racks or use branches to save surface space and create stunning vertical displays.
- Natural Materials – Incorporate wood, driftwood, or twigs for warm, organic jewelry storage DIY projects that feel earthy and timeless.
- Multi-Level Designs – Create jewelry storage DIY pieces with different heights and layers so necklaces, earrings, and bracelets each have their own dedicated spot.
- Soft Backgrounds – Paint or line your jewelry storage DIY projects with white, linen, or soft colours so your jewellery truly shines.
- Easy Access – Design jewelry storage DIY solutions with open hooks or trays so you can see and reach every piece without frustration.
- Budget-Friendly Beauty – Use affordable materials like paint, hooks, and thrifted frames to make stunning jewelry storage DIY projects without spending much.
- Personal Touch – Add small vases, candles, or favourite quotes around your jewelry storage DIY to make the whole area feel like a personal sanctuary.
Hands-On Journey: Step-by-Step Guide to Your Jewelry Storage DIY Projects
Making your own jewelry storage DIY is like building a tiny treasure chest — each step is simple, rewarding, and results in something useful and beautiful that reflects your personal style.
- Gather Materials – Collect wood, frames, branches, hooks, paint, and any repurposed items you already love for your jewelry storage DIY.
- Plan the Design – Decide if you want a wall-mounted rack, tabletop stand, drawer organiser, or branch-style jewelry storage DIY.
- Prepare the Base – Sand, paint, or stain your main structure so it looks polished and matches your décor.
- Add Hanging Points – Install hooks, knobs, or small branches at different heights for necklaces and earrings in your jewelry storage DIY.
- Create Trays or Levels – Add small dishes, boxes, or shelves for rings, bracelets, and smaller items.
- Secure Everything – Make sure all parts are firmly attached so your jewelry storage DIY is safe and stable.
- Style the Display – Arrange your jewellery thoughtfully and add a candle, flower, or small mirror nearby to complete the look.
- Enjoy & Maintain – Use your new jewelry storage DIY daily and give it a quick dust every week to keep it looking fresh and beautiful.
With a few simple tools and a little creativity, your jewelry storage DIY projects will not only solve tangling and clutter but also become charming decorative features you’ll be proud to show off.
1. White Display Case Holding Bracelets Rings
Admire the clean sophistication of a simple white display case used as a jewelry storage DIY solution for bracelets and rings. You’ll love how the bright white background makes every piece sparkle while the enclosed design keeps everything dust-free and beautifully organised.
The minimalist case turns storage into elegant décor. This jewelry storage DIY is perfect for those who want a polished, gallery-like look.
2. Open Drawer Top Bed
Discover a clever jewelry storage DIY idea using an open drawer placed on top of a bed or surface. You’ll love how this simple repurposing creates an instant, accessible tray for daily jewellery while keeping everything visible and easy to reach in the morning.
The open drawer brings unexpected practicality. This jewelry storage DIY is quick, budget-friendly, and surprisingly stylish.
3. Table Topped Candles Jewelry Top Wooden
Enjoy the warm, inviting scene of a wooden table styled with candles and jewellery in this relaxed jewelry storage DIY vignette. You’ll love how the natural wood provides a beautiful base while the candlelight makes your pieces glow softly, turning storage into an atmospheric display.
The combination feels cosy and decorative. This jewelry storage DIY adds a touch of everyday luxury to your space.
4. There Is Dart Some Keys Hanging
Explore a fun and creative jewelry storage DIY using a dartboard or similar round object with hooks for hanging keys and small jewellery. You’ll love how this unexpected repurposing adds playful character while keeping items neatly organised and easy to grab.
The round shape creates visual interest. This jewelry storage DIY is perfect for those who enjoy whimsical, one-of-a-kind solutions.
5. Green Framed Jewelry Rack Many Different
Admire the charming vintage feel of a green-framed jewelry rack holding many different pieces in this colourful jewelry storage DIY. You’ll love how the painted frame adds personality while the open design keeps necklaces and earrings visible and tangle-free.
The green tone brings fresh energy. This jewelry storage DIY is easy to customise with any colour you love.
Latest Articles
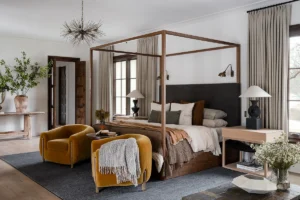
- 🌿 Whispering Petals & Moonlit Glows: Room Decor Ideas That Transform Your Bedroom into a Living Meadow

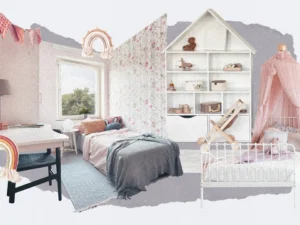
- 🌸 Whimsical Petal Sanctuary: Girly Room Decor That Blooms With Pink, Gold & Fairy Light Magic
- 🕯️ Flicker & Fern: Cozy Room Decor That Wraps You in Blush Light and Gentle Greenery
- 🍽️ Golden Hour Gatherings: Dining Room Decor That Feels Like a Meadow Banquet

- 🌿 Petal & Porch: Porch Landscaping Ideas That Make Your Entrance a Living Story

- 🎁 Woven with Love: Gift Hampers That Unwrap Like a Meadow in Bloom

6. Wall Mounted Chess Board Lots Jewelry
Discover the clever reuse of an old chessboard as a wall-mounted jewelry storage DIY with hooks for lots of jewellery. You’ll love how the checkered pattern adds graphic interest while the board provides a sturdy, unique base for hanging necklaces and earrings.
The repurposed chessboard feels artistic and fun. This jewelry storage DIY turns a game piece into practical wall art.
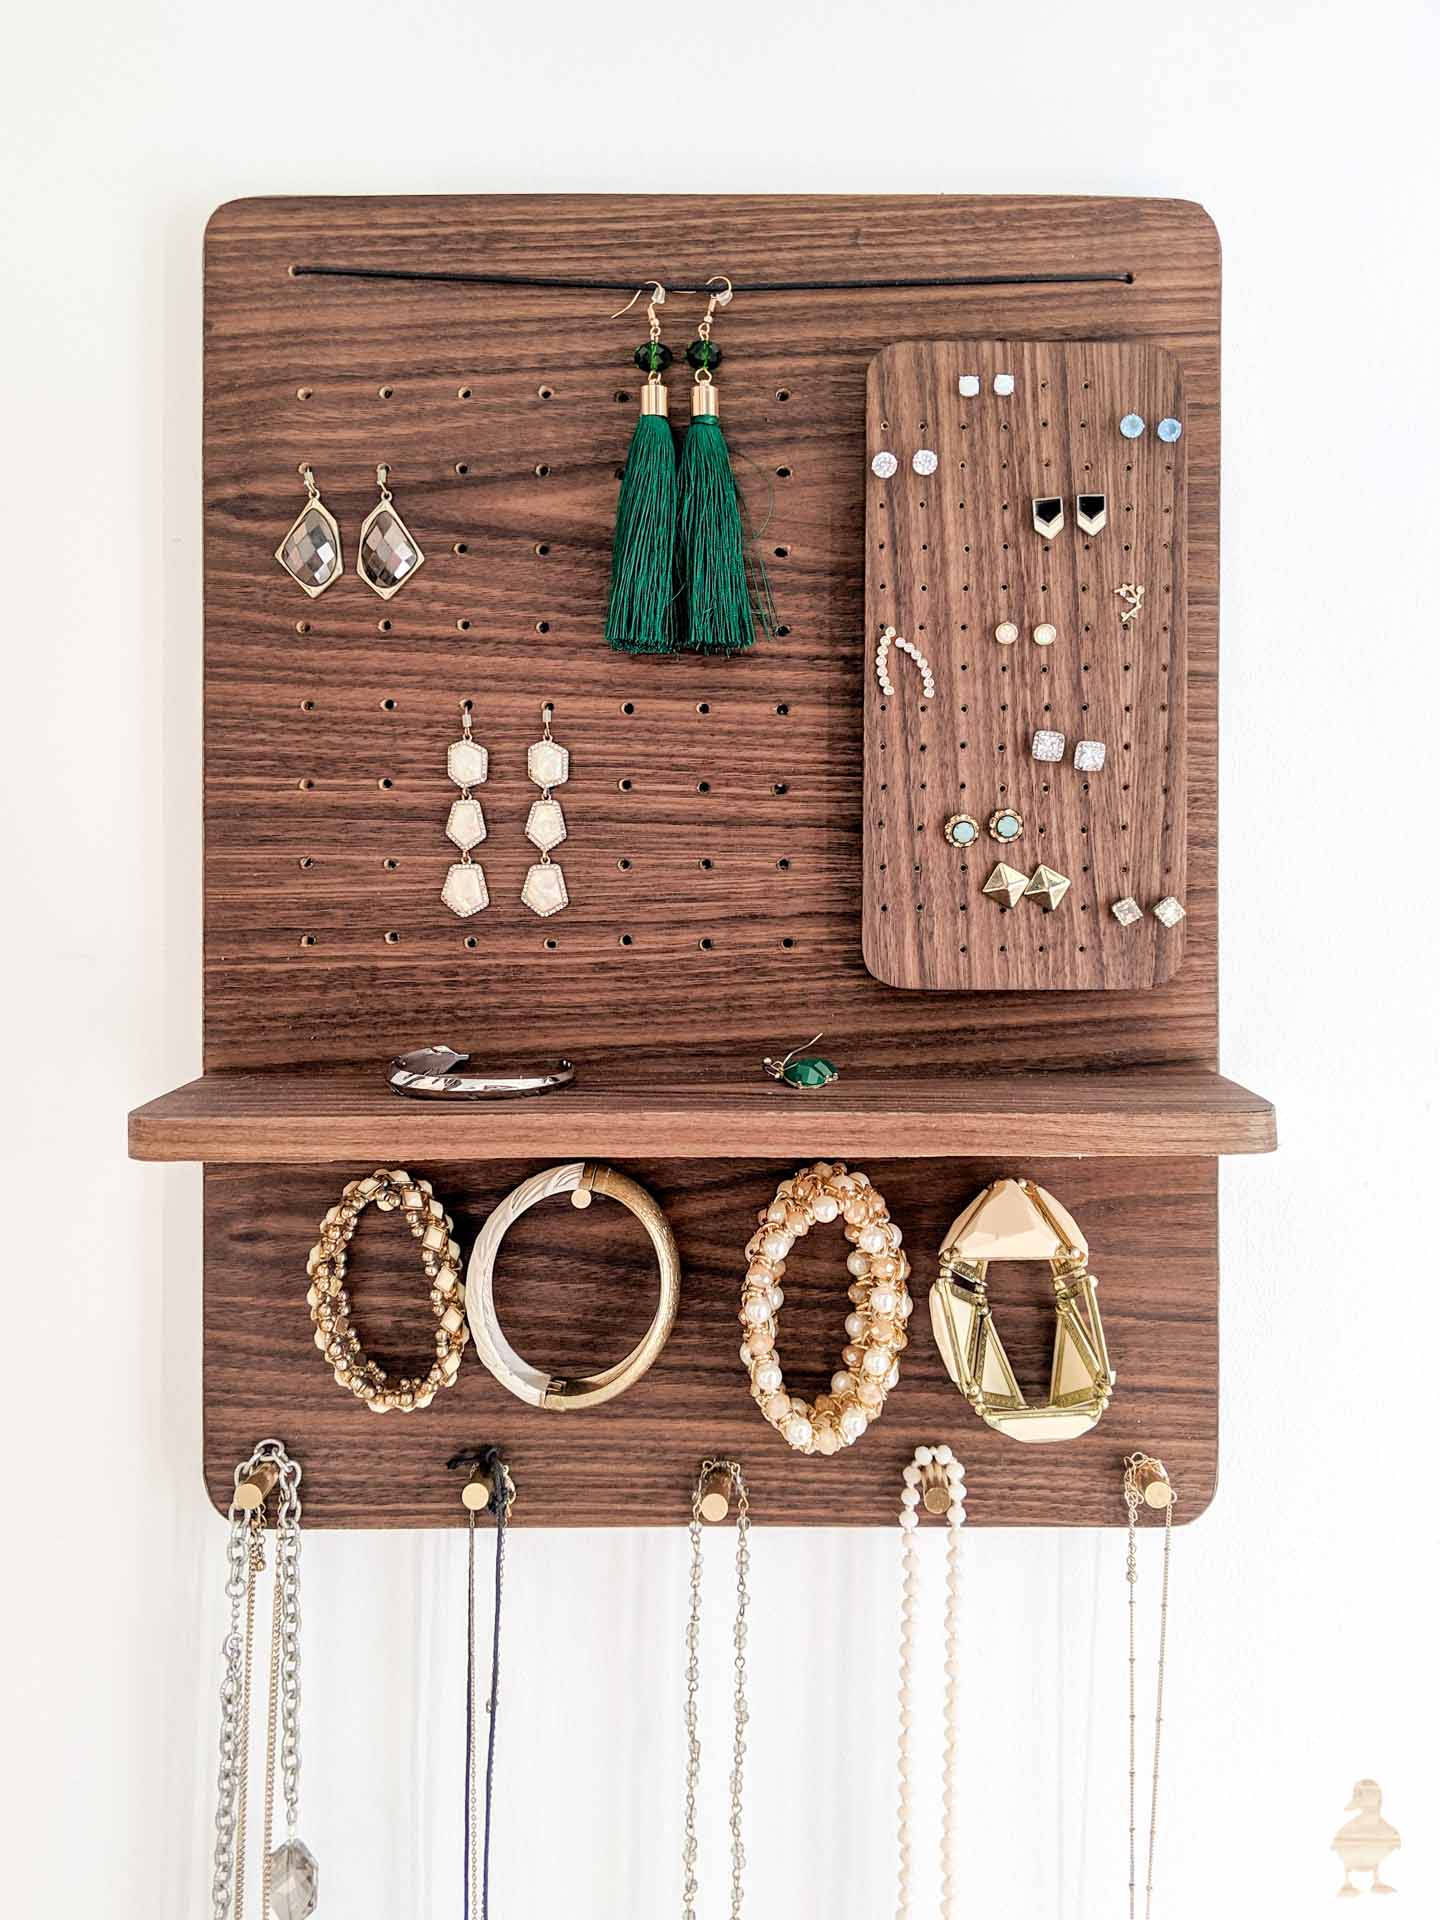
7. Wall Mounted Jewelry Rack Lots Earrings
Explore a practical wall-mounted jewelry rack designed specifically for lots of earrings in this space-saving jewelry storage DIY. You’ll love how the vertical design keeps pairs visible and organised while freeing up valuable dresser or vanity space.
The rack maximises vertical real estate beautifully. This jewelry storage DIY is ideal for earring collectors.
8. Wall Mounted Jewelry Rack Next Door
Admire a sleek wall-mounted jewelry rack placed conveniently next to a door in this clever jewelry storage DIY. You’ll love how the location makes it easy to grab pieces on your way out while the simple design keeps the look clean and modern.
The strategic placement adds daily convenience. Your jewelry storage DIY can be both beautiful and highly functional.
9. Wooden Frame Jewelry Hanging It Next
Enjoy the rustic elegance of an old wooden frame transformed into a hanging jewelry storage DIY. You’ll love how the empty frame creates a beautiful border while hooks or wires inside keep necklaces and bracelets neatly displayed and tangle-free.
The repurposed frame adds instant character. This jewelry storage DIY is easy, affordable, and full of vintage charm.
10. White Frame Many Necklaces Hanging From
Admire the clean simplicity of a white frame with many necklaces gracefully hanging in this minimalist jewelry storage DIY. You’ll love how the bright white makes every necklace stand out while the open design prevents tangling and turns your collection into wall art.
The white frame keeps the focus on your jewellery. This jewelry storage DIY offers maximum impact with minimal materials.
11. There Are Two Tennis Rackets Hanging
Discover the playful creativity of using two vintage tennis rackets as a unique wall-mounted jewelry storage DIY. You’ll love how the strings create natural hooks for necklaces while the rackets add fun, sporty character and a great conversation starter.
The repurposed rackets bring unexpected whimsy. This jewelry storage DIY is perfect for those who love creative upcycling.
Related Articles
12. Wooden Jewelry Rack Bracelets Rings It
Appreciate the practical warmth of a wooden jewelry rack designed for bracelets and rings in this handmade jewelry storage DIY. You’ll love how the natural wood provides a sturdy base while the open structure keeps everything visible and easy to access each morning.
The rack is both beautiful and functional. Your jewelry storage DIY can bring this same natural elegance into your space.
13. Wall Mounted Wooden Checker Board Lots
Explore the clever reuse of a wooden checkerboard as a wall-mounted jewelry storage DIY with hooks for lots of pieces. You’ll love how the checkered pattern adds graphic charm while the board offers plenty of sturdy hanging points for necklaces and earrings.
The game board becomes functional art. This jewelry storage DIY turns nostalgia into practical beauty.
14. Wooden Box Jewelry Hanging From It’s
Admire the rustic creativity of a wooden box transformed into a hanging jewelry storage DIY with pieces draped from its edges. You’ll love how the box adds depth and dimension while the open hanging style keeps necklaces untangled and beautifully displayed.
The box brings texture and warmth. This jewelry storage DIY is easy to make and full of character.
15. Vase Filled Lots Jewelry Sitting Top
Imagine a pretty vase creatively filled with draped jewellery sitting on a surface in this artistic jewelry storage DIY. You’ll love how the unexpected use of a vase turns storage into sculptural art, making your collection look like a floral arrangement of sparkling treasures.
The vase adds height and whimsy. Your jewelry storage DIY can embrace this same poetic and imaginative solution.
16. Wall Mounted Jewelry Organizer Lots Necklaces
Explore a practical wall-mounted jewelry organizer designed to hold lots of necklaces in this space-saving jewelry storage DIY. You’ll love how the vertical design prevents tangling and keeps everything visible while freeing up valuable surface space on your dresser or vanity.
The wall-mounted solution maximises vertical space beautifully. This jewelry storage DIY is ideal for necklace lovers.
17. White Framed Display Earrings It
Admire the clean elegance of a white frame used as a hanging display for many earrings in this simple jewelry storage DIY. You’ll love how the bright white makes every pair pop while the open frame design keeps earrings organised, visible, and easy to select each morning.
The white frame keeps the focus on your earrings. This jewelry storage DIY is minimalist, effective, and charming.
18. Jewelry Rack Several Necklaces Hanging From
Enjoy the straightforward functionality of a jewelry rack with several necklaces hanging neatly in this classic jewelry storage DIY. You’ll love how the open design prevents tangling and makes it effortless to see and choose your favourite pieces every day.
The simple rack is highly effective. Your jewelry storage DIY can offer this same easy organisation and visual appeal.
19. Wooden Cabinet Jewelry Hanging From It’s
Discover the rustic charm of a wooden cabinet with jewellery hanging gracefully from its edges in this creative jewelry storage DIY. You’ll love how the natural wood provides a warm backdrop while the hanging style keeps necklaces untangled and beautifully on display.
The cabinet adds texture and depth. This jewelry storage DIY blends storage with decorative beauty.
20. Ornate Frame Holds Several Pairs Earring
Admire the vintage elegance of an ornate frame used to hold several pairs of earrings in this decorative jewelry storage DIY. You’ll love how the detailed frame adds instant character while the open design keeps earrings visible and easy to pair each morning.
The ornate details bring timeless charm. This jewelry storage DIY turns a simple frame into something special.
21. Facebook Page Image Jewelry It
Draw inspiration from this curated collection of creative jewelry storage DIY ideas shared across communities. You’ll love how real people have transformed everyday objects into beautiful, functional solutions that prove anyone can create unique jewelry storage DIY with a little imagination.
The community spirit is motivating. Your jewelry storage DIY can be inspired by these shared moments of creativity.
22. Wooden Shelf Jewelry Hanging From It’s
Explore the rustic beauty of a wooden shelf with jewellery gracefully hanging from its edges in this practical jewelry storage DIY. You’ll love how the natural wood provides texture and warmth while the open hanging design keeps everything visible and tangle-free.
The shelf doubles as décor and storage. This jewelry storage DIY is easy to build and full of organic charm.
Frequently Asked Questions
Q: What materials are best for jewelry storage DIY projects?
Ans: Wood, old picture frames, branches, metal hooks, and repurposed boxes are excellent for jewelry storage DIY because they are affordable, easy to work with, and allow you to create personalised, unique designs.
Q: How do I prevent necklaces from tangling in my jewelry storage DIY?
Ans: Use individual hooks, separate arms, or small branches in your jewelry storage DIY so each necklace hangs freely. Vertical wall-mounted designs also work especially well for preventing tangles.
Q: Can I make a jewelry storage DIY without power tools?
Ans: Yes — many simple jewelry storage DIY projects only require paint, hooks, glue, and basic hand tools, making them perfect for beginners who still want beautiful, functional results.
Q: Where should I place my finished jewelry storage DIY?
Ans: The best locations are on top of a dresser, vanity, or bedside table, or mounted on a wall near your dressing area so your jewellery is easy to see and reach every morning.
Q: How can I make my jewelry storage DIY look more decorative?
Ans: Style your jewelry storage DIY on a pretty tray, add a small vase with flowers or a candle nearby, and arrange pieces thoughtfully by colour or type so the whole area feels like intentional décor rather than just storage.
Conclusion
Jewelry storage DIY projects are one of the most rewarding ways to organise your collection while adding personal style and creativity to your space. With simple materials and a little imagination, you can create unique jewelry storage DIY solutions that keep necklaces untangled, earrings paired, and bracelets neatly arranged — all while turning storage into beautiful décor. Start today by gathering materials you already have or love, choosing one or two jewelry storage DIY ideas that excite you, and setting aside a relaxed afternoon to bring them to life. Gather wood, frames, hooks, paint, and a few favourite tools — and watch how your handmade jewelry storage DIY transforms your vanity or dresser into an organised, inspiring, and joy-filled corner that makes every day feel a little more special.